
 |
| What an HDD is, basically [Source] |
According to the general consensus of technology experts (read: Google search results), making the change from a spinning-platter mechanical hard disk drive (or “HDD”) to a solid state drive (or “SSD”) is one of the most beneficial and noticeable upgrades you can make to a computer.
 |
| Everything you’ll need to fumble your way through this operation |
- An SSD of your choice (as mentioned above, the capacity should fit at least the size of your operating system – any additional space can be used for applications and primary file storage)
- A SATA-to-USB adapter to handle the preparation/migration prior to opening up your computer and hooking the drive up directly to the motherboard
- Mounting rack and hardware
- A SATA3 cable to connect your new SSD to the motherboard (not necessary if you won’t be keeping your existing HDD as an internal drive)
Now that we have the inventory checklist established, let’s move on to the step-by-step process of upgrading your PC with an SSD. Note that these steps and inventory will also apply to a laptop drive replacement, with appropriate omissions made (such as the mounting rack/hardware, and the additional SATA cable)
Step 1.) Preparing the SSD
 |
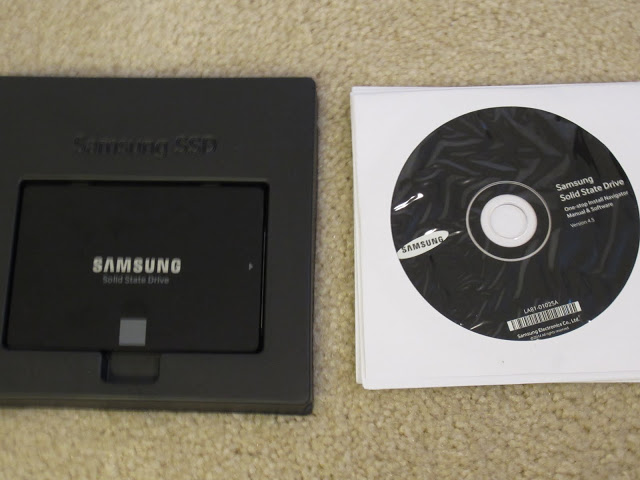
| The chosen SSD, pictured with included migration/management software |
 |
| The SATA-to-USB adapter |
I picked up the Vantec IDE/SATA to USB 3.0 Adapter for $35 from Memory Express. This adapter supports not only SSD/HDD hard drives, but 5.25″ optical drives as well (CD/DVD/Blu-ray). This made the $35 worth it for me to invest, as it allows me to turn any of these devices into a plug-and-play external device (for either data retrieval/recovery, or using a Blu-ray drive with a PC media setup).
 |
| Layout of SATA-to-USB adapter setup – AC adapter to SSD, SATA cord to USB hub, USB hub to PC |
After connecting the SSD to the PC using the SATA-to-USB adapter system, the PC recognized the SSD with no issue as an available storage device. This allowed me to run the Magician software to do the initial checks/setup on the disk.
Functionality-wise, the Magician software essentially serves as a diagnostic check and optimization tool for Samsung SSDs. While the disk is empty, it doesn’t serve much purpose other than to let you know that the drive you just purchase isn’t dead out of the box and is a genuine Samsung product.
The Magician software verified my purchased SSD as a genuine Samsung product (as expected). The software then checked for any firmware updates for the SSD (there was one), and any optimization had to be done once it was mounted as a system hard drive.The next step was to connect the SSD directly to the PC using the SATA ports on the drive and the motherboard of the computer.
Step 2.) Installing the SSD
 |
 |
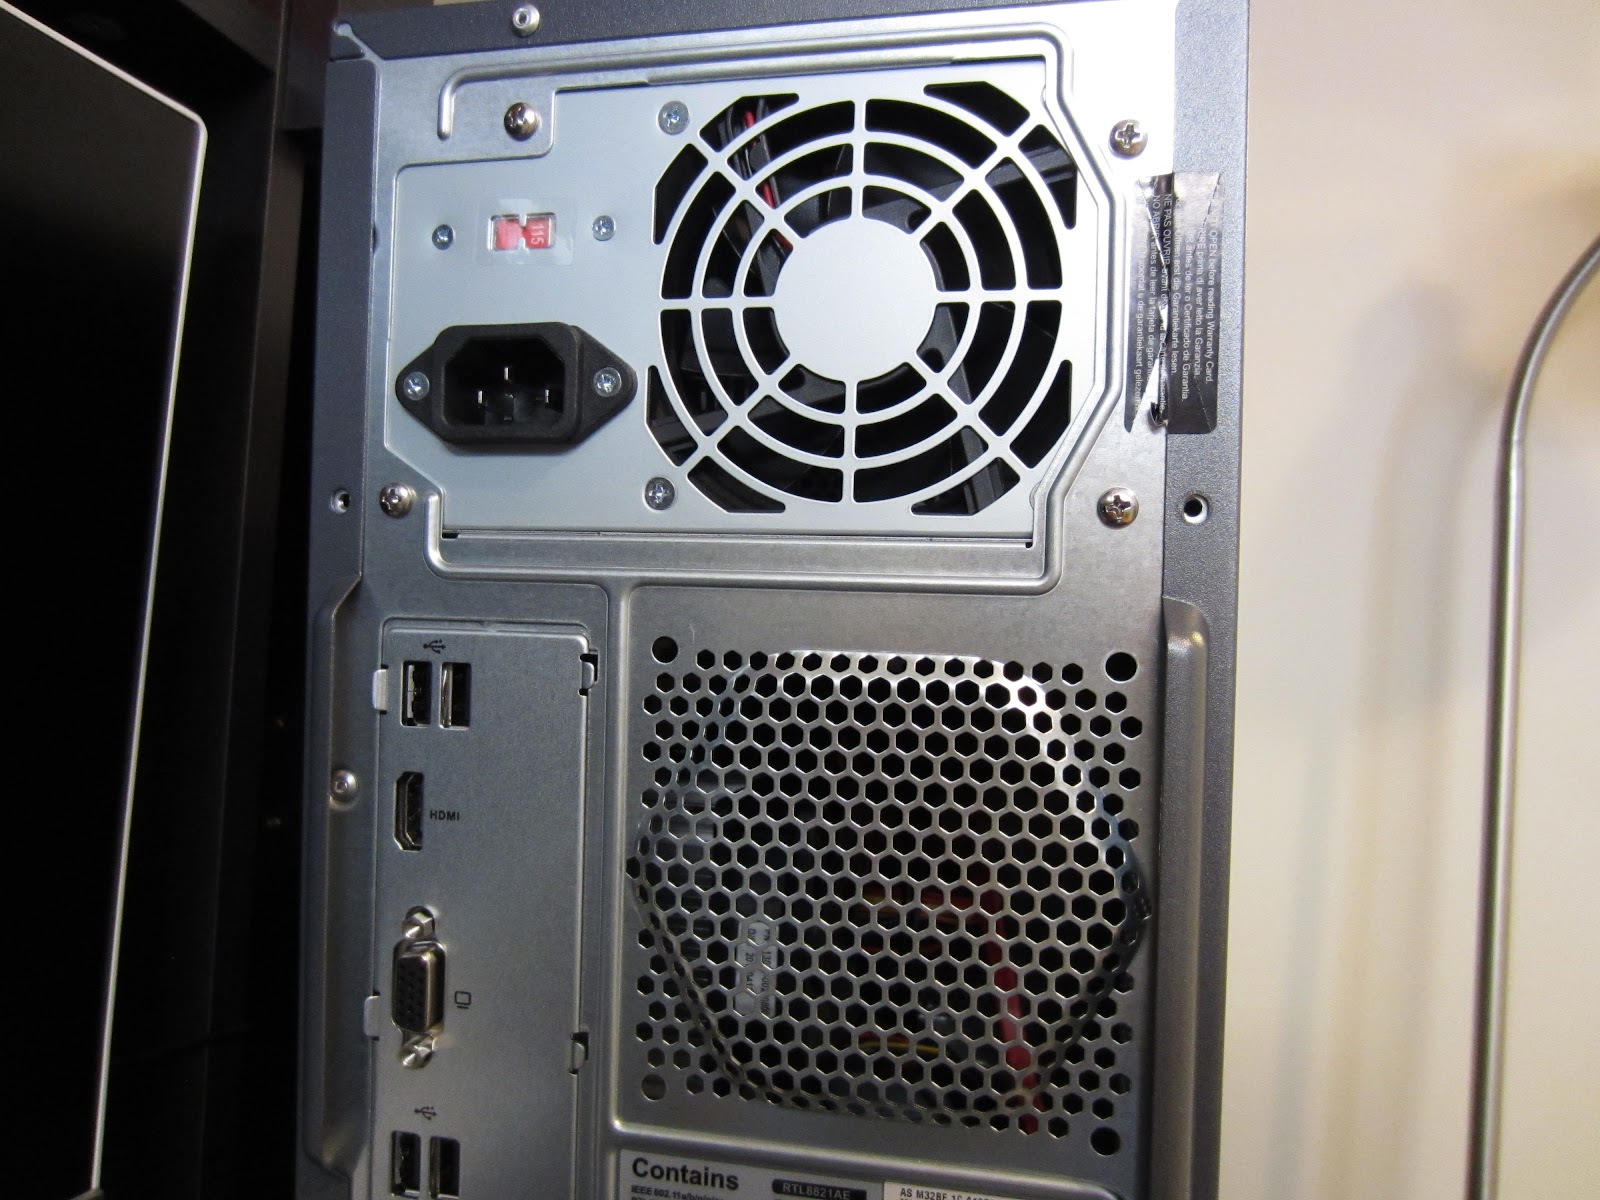
| Rear of PC, after screw removal |
As I hadn’t opened up a tower computer before, I was worried about removing all the various screws I could see when I turned the computer around. Thankfully, I first removed just the screws that were in the grey case (see empty screw holes in the above pictures), and that was all that was required to be removed in order for the sides of the case to slide off.
 |
 |
| Sides of PC with removed casing sides |
After examining the side that allowed access to the internals, I could see where the factory HDD was located and how it was connected to the motherboard. Above the existing HDD was some room with additional mounting holes in the sides – this is where additional drives (such as my SSD) could be installed.
 |
| Holes for additional mounting hardware |
 |
| SATA-connected factory HDD |
 |
| Room above existing HDD to install additional hardware |
Now that I confirmed there was a place to install the mounting hardware, I attached my SDD to the StarTech 3.5″ Mounting Kit I purchased from Memory Express for $15. This kit included the frame, screws for securing the SSD to the frame as well as the frame to the PC, as well as a power supply and SATA2 cable.
 |
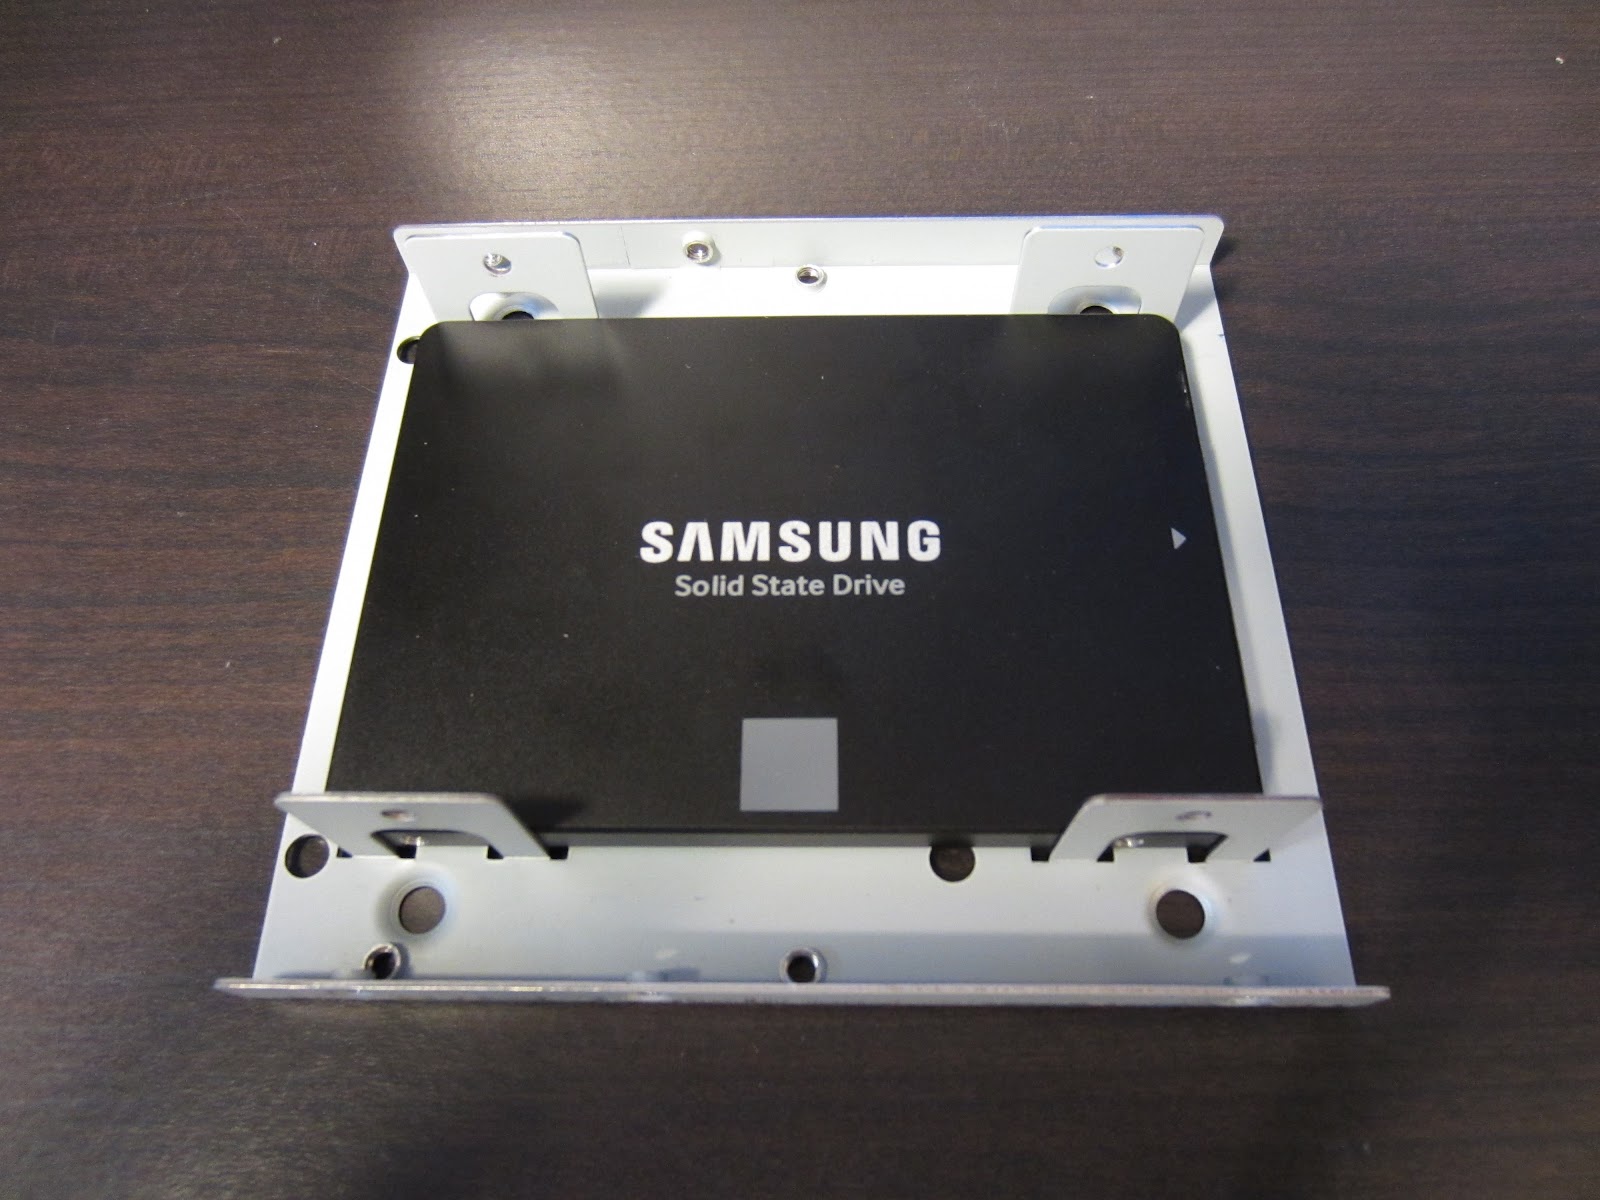
| 3.5″ Mounting kit for 2.5″ SATA SSD/HDD |
| Rear view of SSD laid over top of the mounting frame (screw holes of SSD line up with frame eyelets) |
 |
| Top view of SSD laid over top of mounting frame |
Once the SSD has been screwed into the frame, it is ready to be installed in the PC (make sure you orient the SSD correctly in the frame, as the frame’s side screw holes need to align properly with the PC bay. If you don’t check this beforehand, you’ll have to unscrew the SSD and turn it around to have the port end pointing in the proper direction… not that I would know from experience or anything).
 |
| Mounting kit connected to the PC hardware bay by one side’s screws |
After screwing in one side of the bay, you’ll have to turn the PC around and access the other two screw holes, potentially through a little window like mine has.
 |
| Other side of PC hardware bay, accessed through window (top two screw holes used to connect second frame) |
Once the frame has been installed inside the PC hardware bay, we are ready to connect the device to the motherboard using the SATA3 cable, and to the power supply. I had purchased a SATA3 cable (even though a SATA cable was included in the mounting kit, it was just a SATA2), and there was an unused power supply connector in the PC that could be used with the SSD. All I did was unplug the connector that was in the HDD and use it for the SSD, then use the connector below that one for the HDD (since the SSD was installed above the HDD in the bay). I then connected the SSD to one of the spare SATA ports on the motherboard (it doesn’t matter which one is used, as long as it’s a SATA3 port if there’s one available).
 |
| SSD connected to the motherboard via the red SATA cable, and the power supply via the red/orange/black multi-wire cable |
Now that the SSD is connected to both the power supply and the motherboard, we are ready to boot the computer up and get into some disk management.
Step 3.) SSD Disk OS Setup & Management
To use the SSD as your primary boot drive that the OS runs on, you’ll have to install a copy of your operating system on that drive. This requires preparing a recovery disk/USB drive (I recommend the USB drive, for speed and convenience). Again, Windows has a built-in wizard for this, or there is a Microsoft site that you can download the Windows 10 media creation software wizard. For other operating system versions (Windows or otherwise), the process is the same – make sure you have the OS install media created before moving on.Once this media (either a DVD or a USB drive) has been created, you are ready to use it to install Windows on your new SSD.
First, insert the install media into the computer (either insert the DVD into the drive, or the USB drive into a USB 3.0 port), then restart your computer. Once it boots back up and you see something on the screen, at the bottom of the screen will say “Press < > to enter BIOS” or something to that effect, where < > is a specific key. For my computer, it was <F2>, and it is commonly the same on other systems.
Once you enter the BIOS, you will have the ability to change the boot order of your system devices. In the available devices screen should be your existing hard drive(s), your new SSD, your optical drive (if there is a disc inserted into it), and your USB drive (if there is a drive inserted into it). These devices may have names displayed that aren’t familiar, however there will usually be an indication of which device it is referring to (either based on manufacturer referenced, or connection type). Once the install media device is located, move it to the #1 boot priority (before either of the hard drives). Save and close these changes, and allow your computer to complete booting.
After the computer completes booting, it will take you to the UI of the boot media installation process. For the Windows 10 installation, you are asked to choose which storage volume you would like the operating system installed on; you will see your existing primary HDD partitions (most likely numbered as volume 0), your existing additional HDD volumes (numbered as 1, 2, etc.), and then the highest volume number is most likely your SSD (with some identifying info attached to the volume, such as manufacturer and/or model details). The volume size should also match what you would expect (e.g. ~250GB for a 250GB SSD). This volume will not yet have any partitions.
Once the appropriate drive is selected for the installation, the Windows 10 installation wizard goes through its process and completes the installation. After another restart of the system and modifying the BIOS to boot from the SSD drive first (before any other device), you should be able to successfully run Windows from your brand new SSD!
The previous primary HDD can now be used as either a backup/secondary boot drive, or be wiped clean and reformatted to be used as data storage.
Final Comments and Learnings
- At first I tried migrating my OS to the new SSD using the Samsung Data Migration application. This utterly failed – I was able to boot into Windows, but the desktop wouldn’t load after logging in. If this happens to you and you want to start over, make sure you WIPE the data off of the disk before doing a fresh install. Do not FORMAT the disk.
- Formatting the disk leaves the migrated Windows partitions on the SSD (a memory and recovery partition). When the installation wizard attempts to install the OS on the new drive, it sees more than one partition for the volume and gives an error.
- The only way to fix this is to wipe the disk and re-initiate the installation process.
- To use the Samsung Magician “Secure Erase” function to clean wipe your SSD:
- Create a bootable CD-R through the Samsung Magician app
- Change boot order in BIOS to boot from this CD
- Once booted into the CD-R, a DOS UI initiates that takes you through the Secure Erase process
- It may give a warning/dialogue that the SSD is “frozen”, and will ask you to unplug the SATA power cable from the SSD (NOT the SATA data cable attached to the motherboard), wait a few seconds, plug it back in, then type in “SEGUI0.exe” (that is S-E-G-U-the letter “i”-the number zero)
- Once the SSD has been securely erased, the UI will take you back to the DOS prompt, at which point there seems to be no escape but to power down the computer and power back on
- During the boot process, re-enter the BIOS and re-select the USB Bootloader as the first boot option
- Continue OS installation as described above in Part 3.
- Once the USB bootloader initiates and takes you to the screen where you select the drive to install Windows on, the SSD now appears as a single volume (no additional partitions)
- After about a month of using my new SSD (31 days to be exact), the disk decided to “lock” itself. I spent a couple hours calling around to Asus, Samsung, and Best Buy, it was made clear to me that the only solution was to get a new SSD and start over.
- I called Asus first because I encountered the issue after restarting my computer after updating some software and being prompted to reboot. The computer booted directly into the BIOS and asked me choose which device I wanted to boot off of. The SSD that the OS was installed on wasn’t even available as a device to select, however it was shown in the BIOS as being connected to the SATA port. This seemed like a BIOS issue.
- Asus took me through some BIOS troubleshooting (read: had me reset the settings to “Optimized”, “Default”, and the had me boot into a “hidden” recovery portion by holding <F9> at the boot screen instead of <F2>). After this proved to be futile, they gave me instructions to send the computer in to their service department for them to look at, and to remove any hardware that didn’t come with the computer as they couldn’t guarantee it would come back (okay). I knew they were just going to reinstall windows on the original HDD and send it back if I did that, so I did a bit more digging.
- I remembered I had my Windows 10 recovery USB, so I plugged that in and restarted my computer. Progress! The bootloader UI started up and I picked the troubleshooting option. This is when I discovered what the issue was – the bootloader gave an error that the boot drive it was trying to access was inaccessible because it was locked.
- After doing some searching on “locked Samsung Evo 850 SSD”, it seemed to be a non-unique issue. This is when I contacted Samsung – their response was essentially “Oh I’m sorry to hear that, just send it back to us and we can send you a new one”. I asked *why* it was locked (as it was working perfectly fine an hour earlier before I restarted the computer and hadn’t done anything to it other than update my video card software/drivers). They didn’t have an answer for me, and said that they were happy to replace it (provided that I paid for the shipping and put a deposit on a new SSD until they received the old one so that they could send the new one right away). It was at this point that I checked my Best Buy receipt and noticed that I was at 31 days past the date of purchase (they have a 30 day return policy, and I hadn’t purchased the in-store extended warranty to cover me for manufacturer’s defects and repairs).
- I took my chances and headed over to Best Buy, receipt and repackaged SSD in hand, to ask for an exchange for a new Samsung 850 Evo SSD. Sure enough, the representative at the returns desk took it back with essentially no questions asked after I said it had stopped working, and I even pointed out it was a day past the 30 day period (to which she replied “Ahhh, don’t worry about it”).
- Installation to this second SSD went a lot more smoothly than the first one, thanks to these prior learnings/experiences. It has been working perfectly without issue since.